If you own a home in Florida, there’s a very high chance you’ve seen flex ducts in your attic. Some mobile homes also have flex ducts underneath them. Flex ducts look kind of like slinkies covered in aluminum foil (or a black jacket). They are great for our hot climate, as they’re flexible and have layers to keep heat and moisture out.
Despite these ducts’ widespread usage in Florida, they sometimes get a bit of a bad rap. Flex ducts can be just as effective as sheet metal ducts and work exceptionally well in our climate. The main problem comes from poor installation.
So, how can you tell if your flex ducts are good or bad? Today, we’re going to help you spot poorly installed ductwork. With this knowledge, you may be able to determine if your flex ducts are partially to blame for discomfort in your home and if it’s time to call a contractor to make things right.
GENERAL CHALLENGES OF DUCTS
Ducts can make or break your A/C system. Although ducts are essential for air from point A to point B, they decrease the efficiency of your A/C system through leaks and friction.
Flex ducts are not necessarily more susceptible to leaks or friction than other types of ductwork. However, poor assembly practices will make leaks and friction a lot worse.
Sheet metal and fiberglass ducts are often pretty easy to seal up where one piece starts and another one ends. However, flex ducts are round and flexible. Even though they’re great for fitting into tight or oddly designed spaces, sealing them can be a challenge. Incomplete or improper sealing may cause leaks. When there is a leak, hot crawl space air (which may also contain dust) can seep in, and it’ll reduce your A/C’s ability to cool your home. Even worse, leaks in the ductwork can mess with the pressures in your home when the A/C runs; your home might pull in more unconditioned air through cracks around recessed lights and vents.
Friction occurs when the duct’s inner surface slows down the air in the duct as it rushes through the duct system. It’s unavoidable, and we have to design ducts to overcome it. The air can slow down too much if it has too much ground to cover or ducts that are too small. When the air slows down too much in the ductwork, the A/C unit becomes less effective.
Friction depends on quite a few factors, including the duct size (smaller ducts have more friction than large ones). However, flex ducts are unique because they can be extended and compressed. When ducts are compressed, the friction rate is greater than if they were fully extended.
You can typically see problems that increase friction with the naked eye. Friction in a flex duct system will depend on duct extension, the duct’s support system, and the curves in the ductwork.
PROPER EXTENSION OF THE DUCTS
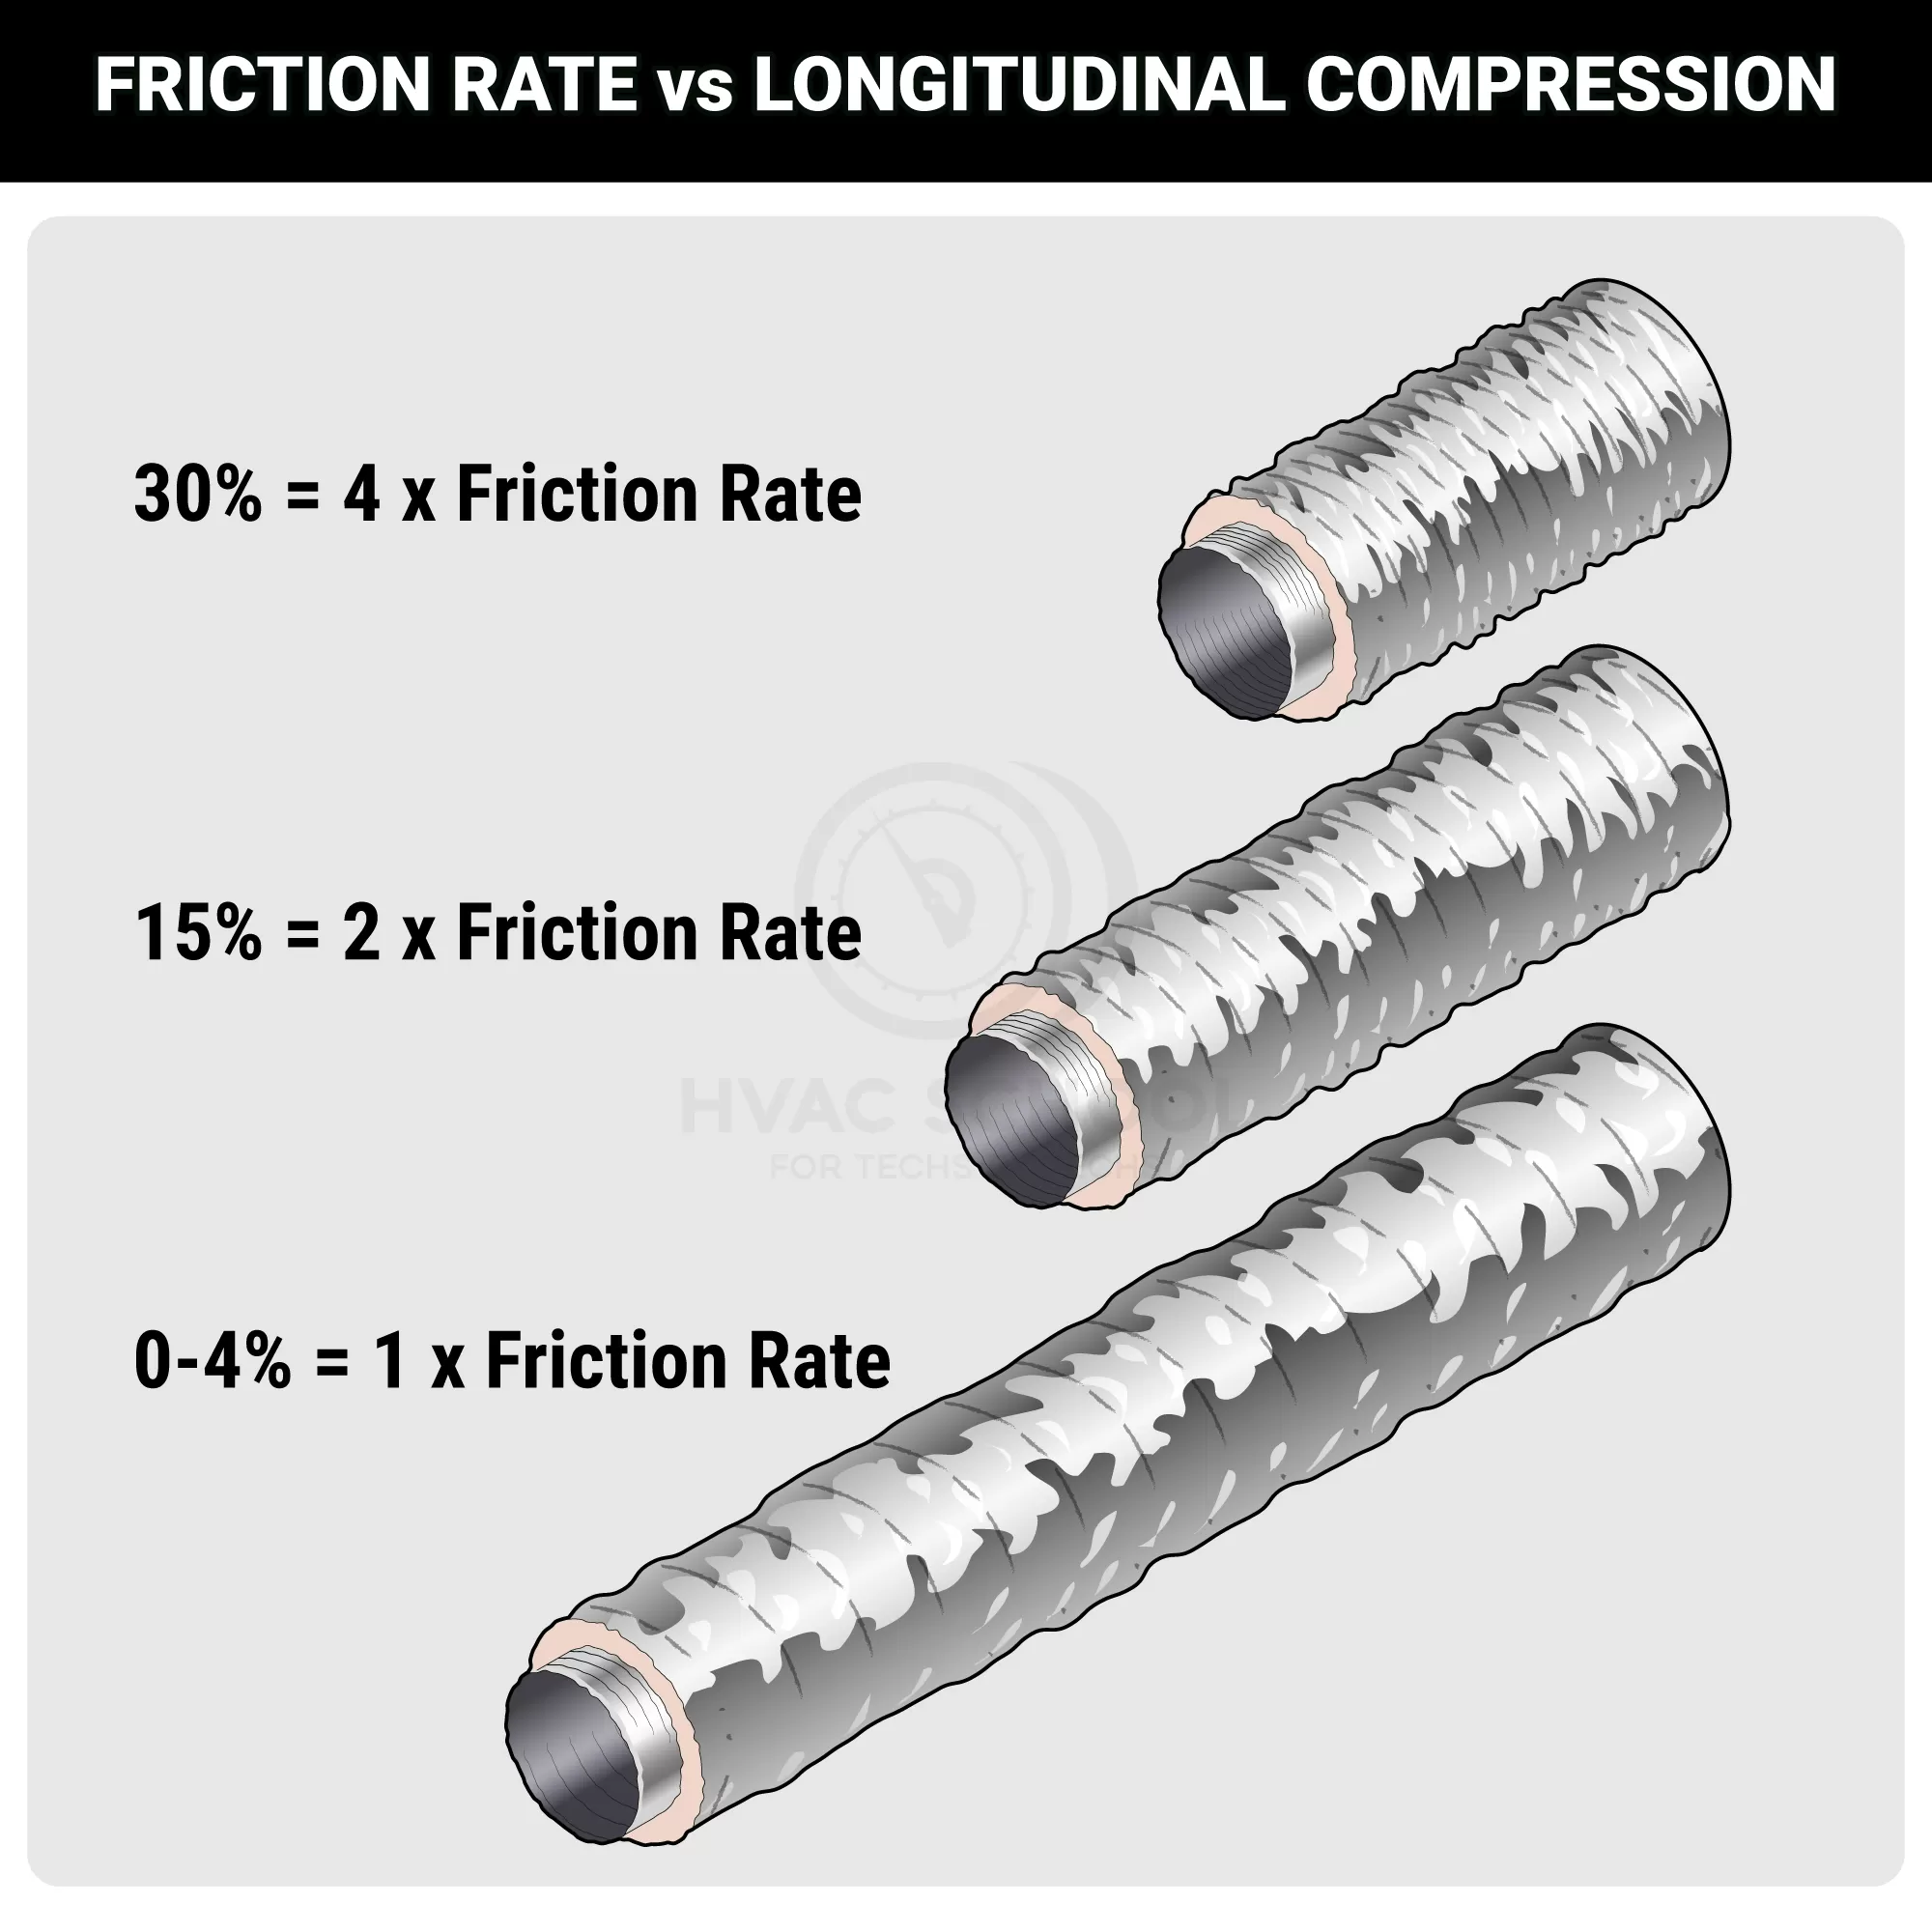
The more compressed a flex duct is, the less smooth the inside will be. There will be a lot more friction for the air to overcome. As you can see in the graphic below, compressed ducts may result in up to FOUR TIMES the friction and air resistance as a fully extended duct!
If there is too much ductwork, the installer should cut the ductwork short. The unused length won’t do the airflow any good if it’s just left on and compressed.
Cutting off merely 2–6 feet of the duct and fully extending the remaining ductwork can make a clear difference. That difference in friction will save homeowners money on their electric bills.
PROPER STRAPPING AND SUPPORT
Sometimes, ducts can’t just travel along the floor. Some flex ducts need proper support and strapping.
Proper strapping and support are tricky, as the building codes may allow some less-than-stellar practices. One of these practices is allowing the ducts to sag between straps/supports. Sagging isn’t illegal according to code, but it decreases the airflow.
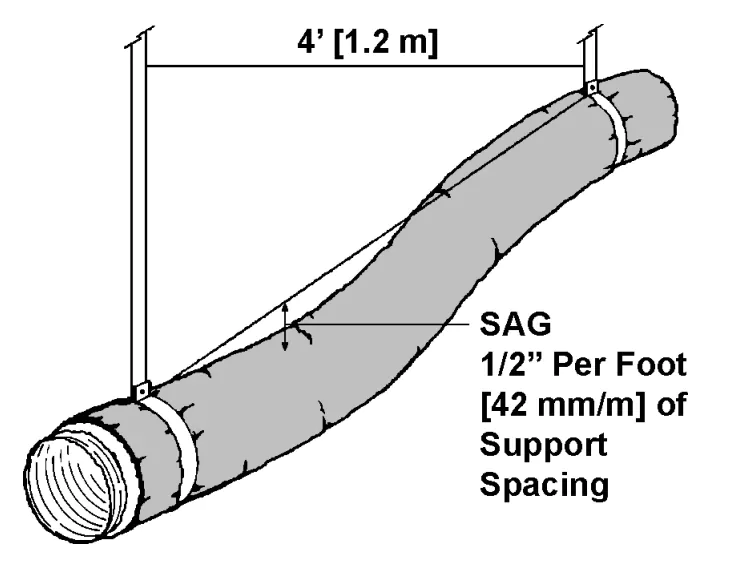
All flexible ducts will probably sag a little bit, but they should NOT create a U-shape. According to Energy Vanguard’s guide to duct installation, the best practice is to limit sagging to 0.5 inches per foot between supports. Of course, the contractor should follow the duct manufacturer’s recommendation for the spacing between supports, but the spacing should not exceed 4 feet.
CURVES IN THE DUCTWORK
Remember when we discussed friction? Curves in the ductwork cause the duct lining to scrunch up, increasing friction AND the effective distance the air needs to travel. Those curved areas of ductwork are rather ineffective.
Since curves severely reduce the effectiveness of the duct, the goal should be to minimize them. When a curve is unavoidable, such as in the diagram below, you can minimize bad effects by keeping the ductwork extended and well-supported.
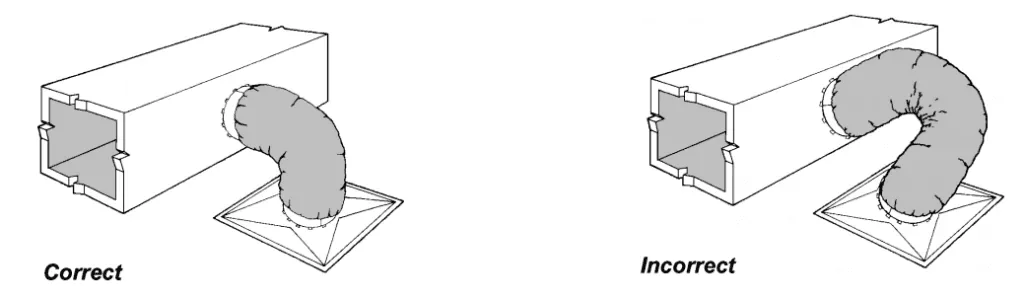
The duct on the right is longer than the one on the left, has a bigger curve, and is compressed around the bend. If your ducts look like the right example, then your ducts could be holding your A/C system (and your comfort) back from its full potential.
PROPERLY SEALING FLEX DUCTS
Determining if your ducts have been sealed correctly is a challenge. You may be able to see rings of a white sealant on the outside of your duct. That should mean that the ducts are sealed, right?
Not necessarily. Building inspectors indeed look for that sealant on the outside to determine if the duct system meets the building code requirements. However, that sealant is on the outside and doesn’t say much about the quality of the entire connection.
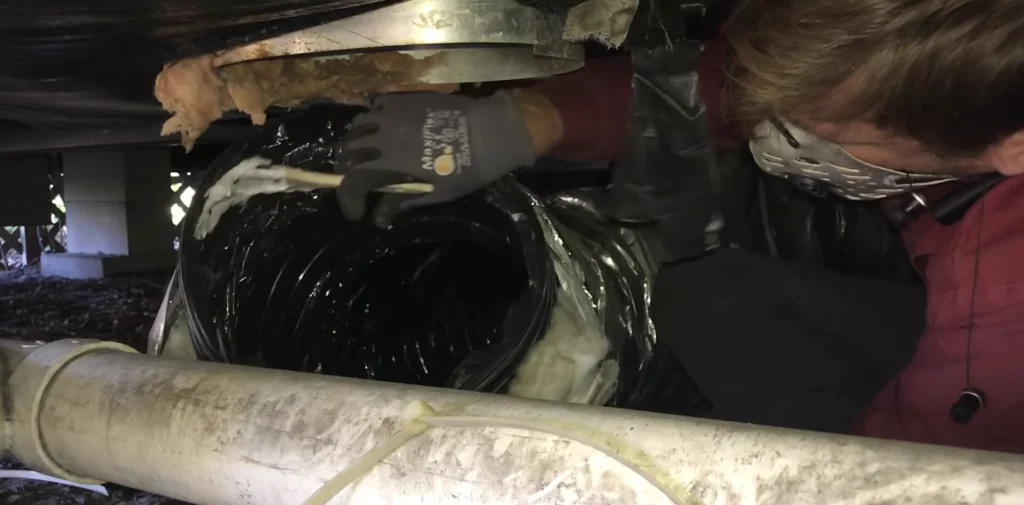
While we do use that white sealant to seal the ducts, we also do it on the INNER LINING of the duct. In the image above, you can see Bert applying some of that sealant to the inner lining of the duct under a customer’s mobile home. Another process is to apply the sealant to the collar and slide the inner lining over; this is the preferred method when the collar is easy to access (i.e., not under trailers).
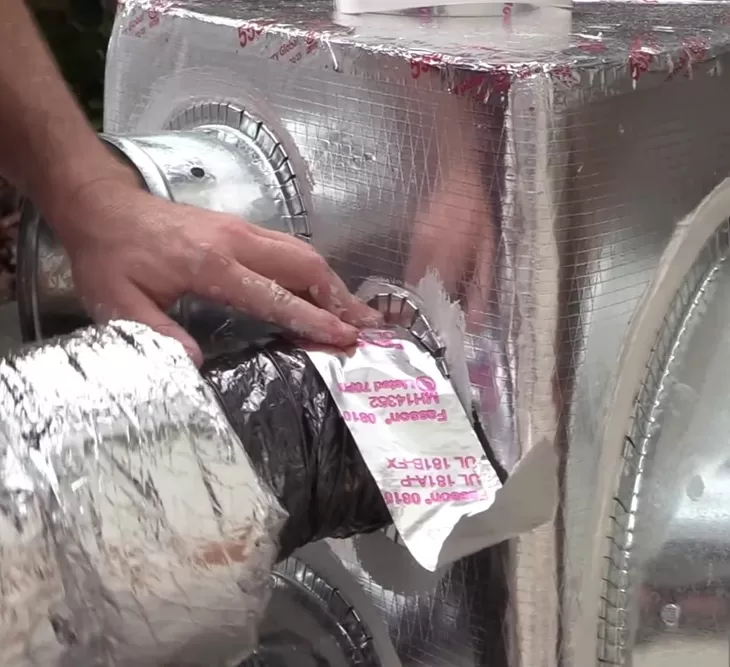
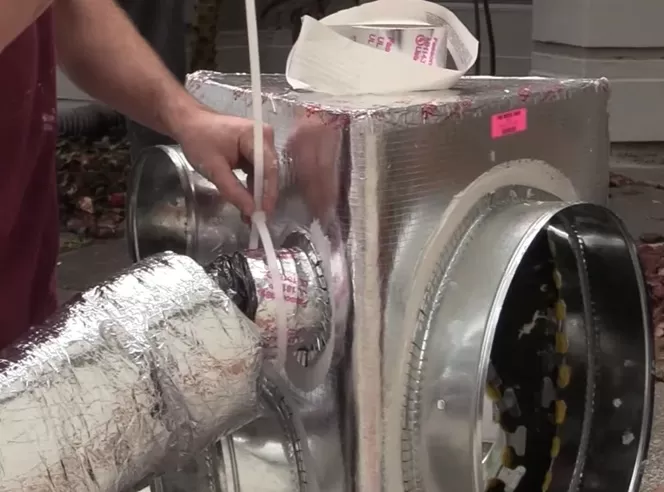
Our process at Kalos actually uses three things to help make a strong duct connection. First, we use silver tape to connect the inner liner to the duct collar. We make sure it goes on securely with a tape squeegee. Then, we use a cable tie strap to reinforce the connection. Finally, we apply the sealant. Then we seal the outer jacket with more of the sealant.
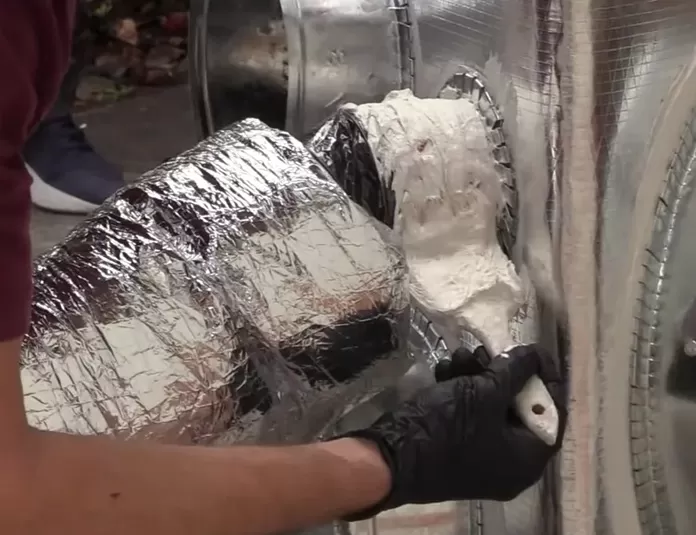
Our ducts have the exterior seal to pass inspections and prevent water vapor or heat from getting past the outer jacket and insulation, but they also have three different means of securing the duct’s inner liner, which is what matters most.
CAN AN A/C CONTRACTOR HELP WITH MY FLEX DUCTS?
Yes! Having a professional come out to examine your ducts and propose a solution can reduce your electric bill and make your comfort more consistent.
At Kalos, we can perform tests that help determine the leakiness of your ducts. If you have detached, leaky, or poorly constructed ducts, we can inspect your ducts and determine how to proceed. If you want to install a new A/C replacement, our comfort advisor can check out your ductwork and give you a quote to replace it.
Kalos performs a wide range of residential HVAC work, not just duct upgrades. If you want a quote for a new A/C unit or have any HVAC-related service calls, Kalos is here to help. You can call or text us 24/7 at (352)-243-7099. One of our representatives will be happy to help get you on the schedule or answer basic questions about your A/C system. You can also read more about our residential HVAC services HERE.