If your A/C unit hasn't been running as well as it usually does, you may wonder if you have a leaky HVAC system. After all, a system that doesn't have enough refrigerant inside of it won't cool as efficiently as one that has the proper amount.
But what exactly is a leaky HVAC system? How do HVAC technicians find and fix A/C system leaks?
In this article, we'll cover what a “leaky system” really is, what it looks like, how we find it, and how we can solve the problems they present.
WHAT EXACTLY COUNTS AS A “LEAKY” HVAC SYSTEM?
Believe it or not, every system leaks to some extent. In all HVAC systems, there are some imperfections in the metal that makes up the coils and tubing. However, that leak rate could range from pounds per month to ounces per decade.
So, instead of creating the impossible leak-free system, we try to limit leakage as much as possible. We look for unacceptably large leaks that we can pick up with electronic leak detectors, pressure tests, and soap bubbles.
Significant leaks may cause your system to lose refrigerant (and its ability to keep you comfortable). Those leaks may also exceed the EPA's leak guidelines, so we should fix them as soon as possible.
WHAT CAN CAUSE SIGNIFICANT LEAKS?
In many cases, severely leaky HVAC systems stem from one of five main causes: galvanic corrosion, formicary corrosion, abrasions, poorly brazed or soldered joints, and poor mechanical connections.
Galvanic corrosion is a fancy way of saying “rust.” When acids and moisture mix with oxygen, you get reddish corrosion on the metal. Although this type of corrosion can cause leaks, the leaks are generally smaller and take a while to start becoming problematic.
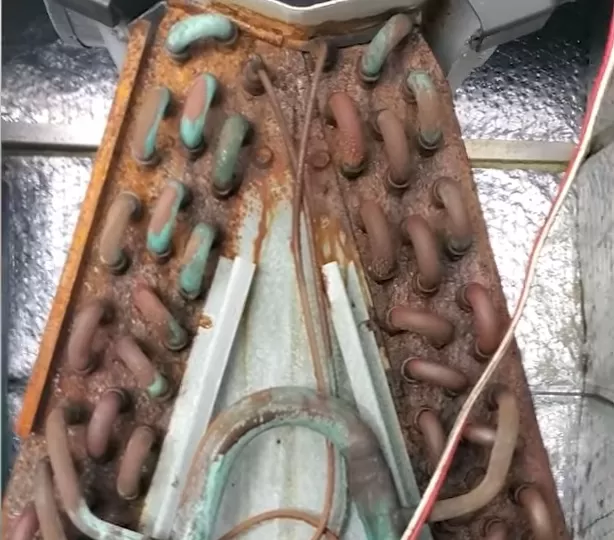
Formicary corrosion, or a blackish type of corrosion, has become much more common lately. The main causes of formicary corrosion include chemical reactions from ant nests and VOCs (the compounds found in many household types of household cleaners, furniture, and flooring).
Abrasions happen and can wear down the coils or tubing over time. In many cases, other metal pipes and even wiring can cause chafing, which leads to abrasions. If those rubbed-out areas get bad enough, refrigerant might soon start to leak from them.
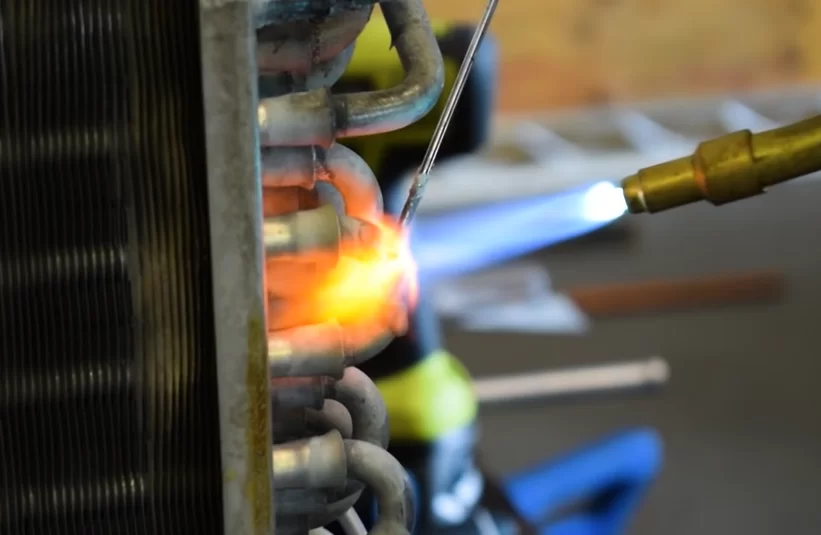
Poorly brazed or soldered joints are the results of technician or installer errors. Copper piping is connected at joints, which have an alloy that melts into the crease of the joint and cools to hold the pipes together. When someone fails to heat the joint properly while they braze in new copper lines, they may fail to draw the alloy all the way in. That alloy creates a seal, and a poor seal allows refrigerant to leak at the joint.
In some cases, the flared connections can also be leak points. Occasionally, technicians or installers may fail to torque down those connections correctly, leaving them too tight or not tight enough. Improper tightness may result in refrigerant leakage.
WHERE CAN LEAKS HAPPEN?
Leaks can happen at any point of the system where refrigerant is passing through. So, leaks may occur in the evaporator coil (inside the air handler), in the condenser coil (outdoors), in the line set between system components, at joints and fittings, or at valves. Corrosion (of the galvanic or formicary type) is especially common on coils. However, leaks related to poor installation practices are more common at joints and fittings.
In some cases, leaks occur inside the line sets of mini-split units due to an apparent reaction of the copper with moisture and tubing insulation. We have noticed a concerning trend where the copper piping corrodes underneath white tubing sheaths, and leaks result from that corrosion.
HOW CAN AN HVAC TECHNICIAN CONFIRM THAT A SYSTEM IS LEAKY?
Especially in new installations, we need to be able to confirm that a system can hold its contents, whether that's refrigerant, air, or nitrogen. To do that, we use something called a nitrogen pressure test. At Kalos, we require our installers and techs to perform nitrogen pressure tests each time they braze in new copper piping. That way, we can be sure that the joints are leak-free.
During a nitrogen pressure test, the HVAC professional will clear the system by purging the lines with nitrogen. Then, they will add a set amount of nitrogen to the system and put it under pressure. While the system is under pressure, pressure gauges attached to the service valves will measure the rate at which the nitrogen leaks from the system. If there is a significant leak, then the gauges will signify a noticeable pressure drop. The technician will then use the leak rate to determine if the system passes or fails the pressure test.
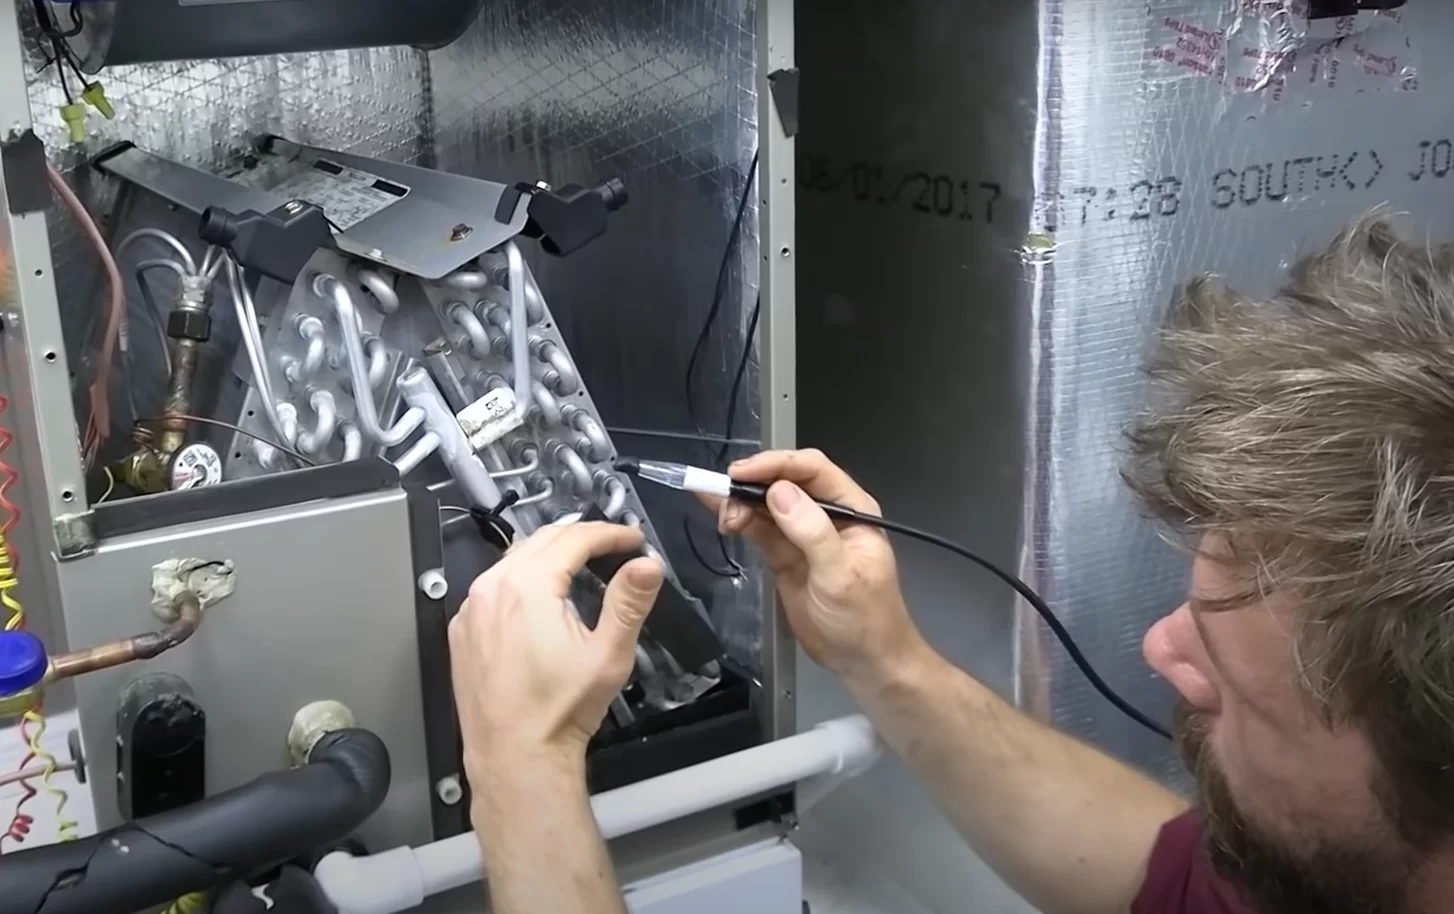
If the system fails the pressure test, then the technician will have to search the system for a leak. That technician will use multiple tools to pinpoint the exact location of a leak.
HOW CAN AN HVAC TECHNICIAN PINPOINT A LEAK?
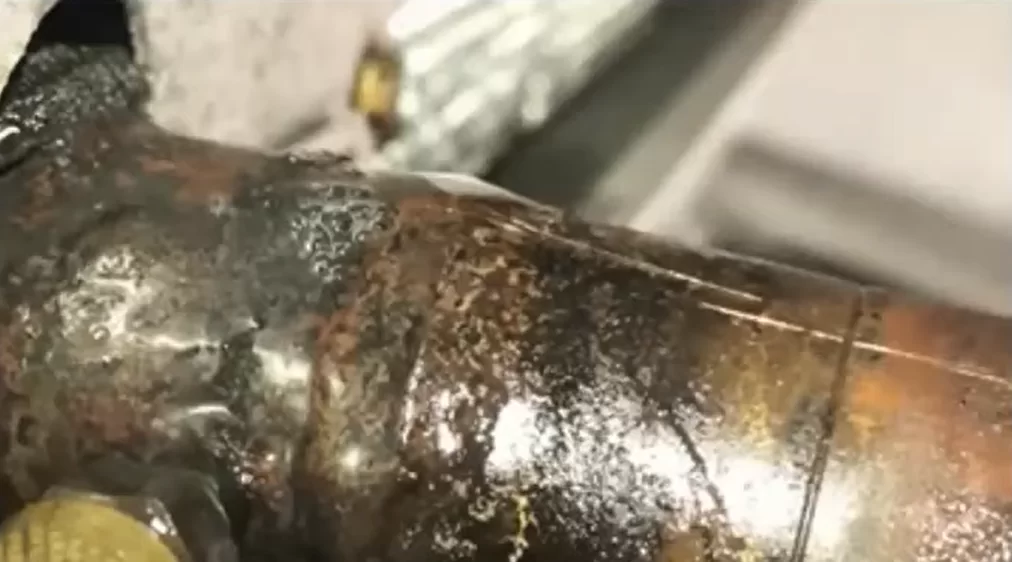
HVAC technicians use their senses and some tools to locate leaks. First, they're typically trained to look for visual signs of leaks, including areas where oil has gathered on the components. Oil spots indicate that there is an opening somewhere in the system, and it has allowed oil to seep out.
On the tool side, techs generally use electronic leak detectors and a liquid “bubble” solution to pinpoint leaks. Most electronic leak detectors “sniff” for leaking refrigerant, which is usually heavier than air and has a different chemical profile. Other ones require the technician to listen for sounds of air being forced through openings. Then, technicians can also apply a liquid leak reactant to a possible leak site and use a “bubble test” to confirm a leak's location.
Electronic leak detectors
Our technicians carry electronic leak detectors on them at all times. The leak detectors we use at Kalos come in three main varieties: heated diode, ultrasonic, and infrared.
Heated diode leak detectors measure trace amounts of refrigerant in parts per million. These are some of the most sensitive electronic leak detectors on the market and are excellent for pinpointing leaks at a specific location.
Infrared leak detectors also measure small amounts of trace refrigerant. These detect leaks by constantly comparing the air content at the sensor, so these detectors need to be moving at all times to pick up leaks. However, false positives tend to be rather rare when techs use this type of leak detector correctly.
Ultrasonic leak detectors pick up sounds rather than trace amounts of refrigerant. So, a tech could force nitrogen through a system and pick up a noise coming from the leak. As nitrogen passes over oil inside the system, it will make a sound as it tried to escape. For technicians with trained ears, ultrasonic leak detectors are quite reliable.
“Bubble” solutions

“Soap bubbles” or “bubble” solutions are liquid leak reactants that help us pinpoint leaks. When we spray some “soap bubbles” on a coil, valve, or fitting, we wait for bubbles to form. The size of the bubbles indicates the severity of the leak; decent-sized bubbles that appear rather quickly show us that we have a significant leak. However, cocoons of microbubbles that occur over a period of time indicate a smaller leak. These smaller leaks will still cause the refrigerant charge to deplete over time, though.
HOW CAN HVAC TECHNICIANS FIX LEAKY SYSTEMS?
It IS possible for HVAC techs to add a bit more refrigerant to the system without replacing parts. However, frequently recharging the HVAC system isn't good for the system and can be costly over time. In cases where recharging is unsustainable, HVAC professionals will usually recommend replacing the leaking components.
In cases where the leak is on one of the U-bends of an aluminum evaporator coil, we may be able to patch the leak. We would do that by soldering the U-bend and creating a seal over the leak. In other cases, however, patching the leak may cause more harm than it solves. (For example, your system performance might decrease if we have to tear away fins to reach the leaking part of the coil. Tearing away the fins to access the leak is fine for temporary fixes, but it usually isn't sustainable as a permanent fix.)
So, most of the time, we would recommend replacing the leaky component. There is an up-front cost of replacing the component, but regular recharging could end up being more costly over time.
As you can see, the HVAC technicians have a standardized set of steps that they take to diagnose leaky systems. Before a technician recommends replacing or patching a component, they need to figure out exactly where a leak is. They also need to figure out if there are multiple leaks and ensure that they have done the best possible repair or replacement job to rectify a leaky HVAC system.